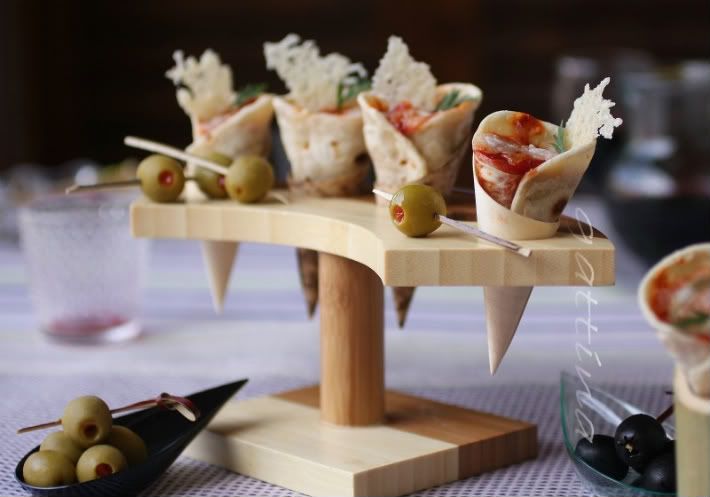
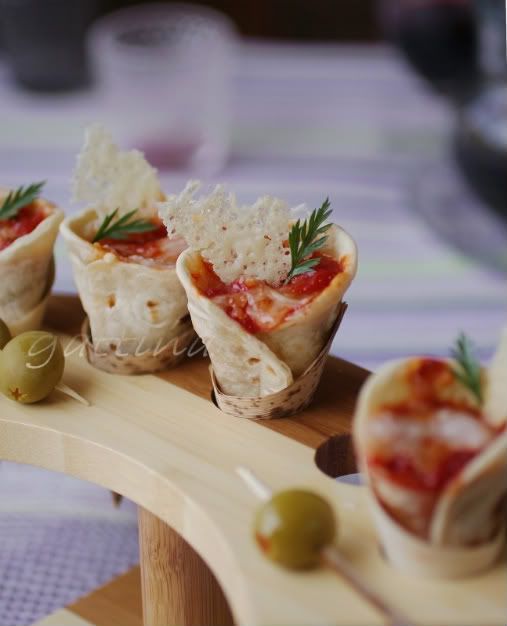
 The pizzas are put inside pine wood cone/ bamboo cone, and set them up with a bamboo stand
Thanks to Facebook, I have a chance to see my good friend Anthony from the photos he posted. He has tons of cocktail parties to attend. Almost in every photo he is holding a glass of wine... I know him though, he doesn't drink.
And the kids, if they aren't not holding an ice-cream, then would be a plastic microphone... Maybe, we all love something in a cone shape?!?
How about in the next party we serve these mini pizza cones? I am sure from toddlers to adults no one can resist! And they won't make a mess like sliced pizza when people walk around with it at hand.
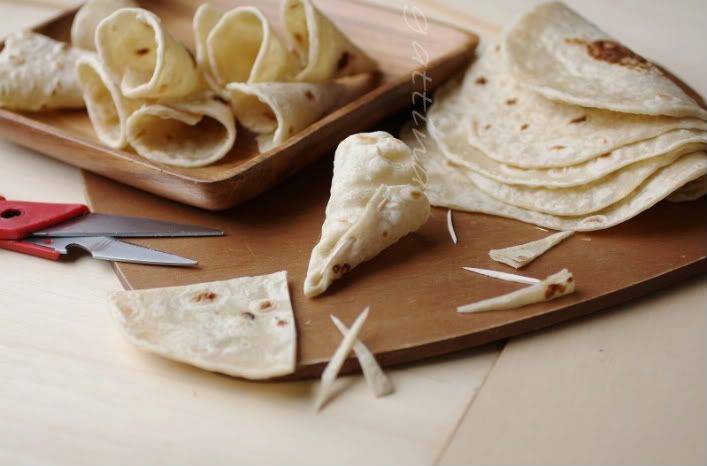
The pizza base/cone is actually a home-made tortilla bread. Once you taste the home-made, you won't go back to the commerically manufactured! The traditional/classic tortilla has lard or vegetable shortening in it, but since olive oil is so famous and superb in this country, I see why not to use it instead. The bread might lose the authenic fluffy texture, but use it as a pizza base I think it is absolutely acceptable. Making it to a cone isn't complicated at all, and I am showing you how we achieve it just with a couple of simple things.
Recipe of Home-made Tortilla Bread
(yield 12 tortillas, in a diameter of 7 inches/ 18 cm)
- 450g strong flour, premium quality
- 2 Tbps olive oil
- 1 - 2 tsp/s of salt
- approx 180ml of water
- Well combine all the above ingredients, knead about 3 minutes, the dough should feel moist but not sticky.
- Divide the dough to 12 portions (each weights about 70g). Roll each to a circle with a thickness of 3 mm.
- Pre-heat a large non-adhesive skillet, without adding oil, cook dough over medium to high heat for a minute, then cook the other side for a minute or less. Stack the cooked tortilla together in order to let the steam keep them moist. Serve warm.
- They freeze well too. After they cool off, separate each tortilla with a piece of plastic film, seal the stack of bread tightly, go to the freezer.
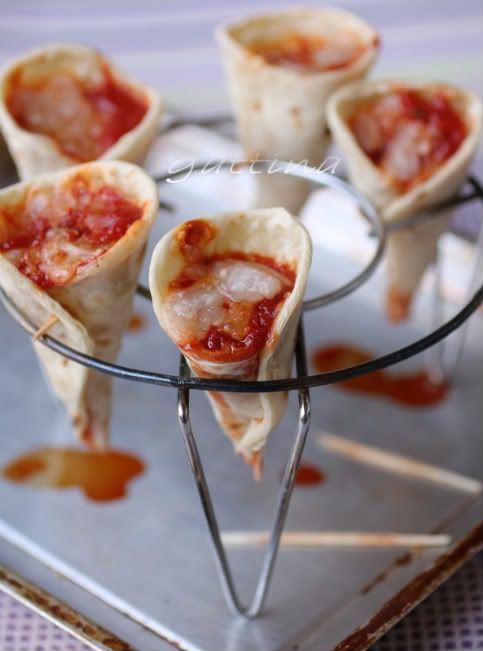
 Fasten the cone with a toothpick, remove it after baking
 Place the cones on a rack. Like this rack is readily available at most Asian grocery stores (we normally use it for steaming).
To assemble the pizza cones, you will need:
- some tortilla bread (one bread yields 3 to 4 cones)
- thick pizza sauce
- your favorite topping/s, e.g olive, onion, or ham
- mozzarella
- parmesan cheese and fresh herb for garnish
- some toothpicks
- a metal rack (see the photo above)
- Cut a tortilla bread to 3 to 4 equal slices. Take one slice, close its two cut sides together and fasten with a toothpick, a cone is formed. Repeat to the rest.
- Gently push little mozzarella to the cone's bottom (to stop the sauce leak too much during baking), then fill the pizza sauce and olive/onion/ham/etc to the top, sprinkle some mazzarella.
- Place the cones between two wire of the rack. If the space is too large, you can push a long toothpick through the cone and let the both ends of the toothpick rest on the wire.
- Bake the cones in a pre-heat oven 180C for 5 - 10 minutes.
- Remove all the toothpicks, garnish with fresh herb and parmesan, serve immediately.
 Pine wood/bamboo cones and the cone stand supplied by Restaurantware

9 comments:
Homemade tortillas are the best! I always make mine...
A great recipe idea. Very original and surely delicious!
Cheers,
Rosa
That is so clever Gattina.
Got to try making torillas at home. Yours look fantastic.
Looks fantastic - and what a great idea to make pizzas into an easy and fuss-free entree for a dinner party :)
Hola! I happened to find your other website, when I logged onto Facebook (my practically non-existent). Looks so beautiful Gattina, you are a rockstar! Miss you... hope you are eating well-
What a great idea for mini pizzas! They look fun to make and kids would have fun eating them too.
What a cute idea!
I love, love, love this! How great!
Hi Aditya, please use the type that you use for making bread. Hope that helps :)
Thak you so much :)
Post a Comment